![]()
![]()
![]()
![]()
![]()
![]()
![]()
![]()
![]()
![]()
![]()
Bird-Flight Photography
First, you must have a camera. Almost any camera will do; however, the technique used to photograph birds in flight will vary slightly with various camera types. These different techniques will be fully covered in this book.
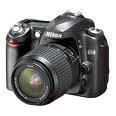
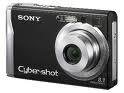
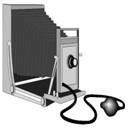
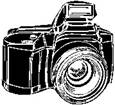
You may use an expensive 35-mm camera similar to a Nikon, Cannon, or Minolta or a less expensive brand. You may use a Kodak Instamatic camera or a box Brownie. You may use a bellows camera, a digital camera, a viewfinder camera, or a twin-lens reflex. You may use a digital camera that is an SLR or a pocket digital camera. Digital cameras work best if they have a manual setting indicated by - M. Any camera may be used; however, some cameras are much easier to use than others for photographing birds in flight. Which is the easiest to use? I suggest a 35-mm SLR camera with a 50-mm lens that can be operated manually (film or digital). What does all that mean? A SLR (single-lens reflex) camera is one where you are actually looking through the lens of the camera as you place your eye to the camera’s rear viewing eyepiece. This is accomplished through a series of mirrors inside the camera. The main advantage in a SLR camera is you see what the film will see; you’re not looking at your subject on a different angle or perspective as you are with a viewfinder camera. A 35-mm (millimeter) camera is one that uses 35-mm film, the most common type of film used today. The film is 35-mm wide. Having fully manual operation means that the photographer focuses the camera and selects the lens opening and the shutter speed to be used. Automatic cameras perform all or some of these tasks for the photographer. On fully automatic cameras, an infrared beam of light often controls the focus, and the shutter speeds and lens openings are chosen by a computer in the camera using the amount of existing light as a basis.
|
 |
|
| Film 35-mm SLR | Film 35-mm view-finder | Digital SLR Camera |
|
|
 |
|
| Film Bellows Camera | Film Twin-lens Reflex | Digital Pocket Camera |
If you have a fully automatic camera, you may very well find that there is a way to shut off the automatic function and operate the camera manually. Check your camera’s manual. Don’t worry, however; almost any camera can still be used successfully to photograph birds in flight. The photographic techniques will change with different cameras, and again, these various techniques will be covered in this book.
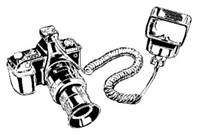
There is one piece of equipment that you must have: an electronic flash. Many cameras have an electronic flash built into them, and you can be successful using this kind of flash. However, an “automatic” electronic flash not permanently attached to the camera is most desirable. An automatic electronic flash is one that can vary the amount of time the flash remains illuminated based on the reflected light from your subject. Most electronic flash units are automatic, and I will discuss this in more detail in Chapter Five. By the way, automatic electronic flash units are so essential to creating wonderful photographs, that the flash actually is more important than the camera for many photographic techniques. If you do not have an automatic, electronic flash for your camera, you may purchase a used one for under $50.00 at your local camera store (2006 prices). Because many people are turning to digital cameras and trading in their film cameras, bargains can easily be found on these older non-digital cameras and associated flash equipment.
|
|
| Detachable Electronic Flash | Built-in Electronic Flash |
Many cameras have an automatic, electronic flash built into them. One word of caution: if you have the new type of camera with an electronic flash that blinks many times in succession before taking the photograph, it WILL NOT work for photographing birds in flight. These cameras are designed to reduce red-eye, that annoying red dot often seen on your prints in your subject’s eyes. Red-eye is caused by the flash reflecting off the blood vessels in the retina of our eyes and back into your camera. The multiple, blinking flash system helps reduce red-eye because the first few flashes cause the iris opening in our eye to reduce. This creates a smaller hole in your eye’s lens helping decrease the reflection of blood vessels from your retina. The last time this blinking flash goes off in its multiple series of quick flashes is when the photograph is taken, but the beginning flashes will frighten away the birds. These multiple flashing cameras may be used for bird flight photography if they have a feature to shut off the multiple flashing and revert to only one flash per photograph.
Next, it will make things much easier if you have a tripod. Again, no need for an expensive tripod, just a simple one. A small tripod only a few inches high that you can set on a table often works very well.
Last, you should have a 10-foot shutter release cable. This is usually 10 or more feet of rubber tubing with a rubber bulb on one end and the other end fastened to your camera's shutter button. When you squeeze the rubber bulb, the shutter button is pushed enabling you to take a photograph while you're 10 feet away from your camera. This will allow you to hide from the birds and keep you from having to be near your camera with your finger ready on the shutter button in case a bird arrived. Often an additional 10-foot section of tubing comes with the shutter release allowing for a total distance of 20 feet. This extra length will come in handy when photographing birds out in the field. These devices may also be purchased at your local camera store. If you have an instamatic camera or your camera does not have provisions for fastening a cable release to your shutter button, you’re still OK. You will not need a cable release to photograph birds in flight; it will just make things much easier and offer more opportunities.
Well, that's all the camera equipment you need-one camera, one tripod, one electronic flash, and one 10-foot cable release. You may use any film, black and white or color. I prefer using color slide film so I can project my bird photographs on a screen for family gatherings.
Now that you are aware of all the camera equipment you need, one small bird feeder will be in order and a mixture of various birdseeds. Fasten the bird feeder to the outside of your window, on the right or left side, not in the middle. Pick a window where there are trees so the birds can rest in the trees between trips to your bird feeder and so you can see the birds in the trees. This is very important, for you to see where the birds are resting, before they fly toward your bird feeder. If you have no trees, a clothesline will do or the wires on a neighboring telephone pole or even some shrubbery. I have even used the ground by sprinkling a few seeds outside about 50 feet away from my feeder. I can then watch the birds on the ground through my open window as they fly upward to my bird feeder. A tree, however, if you have one in your yard, is best.
Take your bird feeder and cover access to all sides of it except the side nearest your window. Cover the sides with a piece of cardboard or anything to keep the birds from landing anywhere on your bird feeder other than the window side. You do this so your camera can be ready where the birds are approaching. If all the bird feeder sides had access to the bird seed, the birds would avoid the side with the camera and you would never get any pictures.
Once you have closed off all the sides of your bird feeder except the window side, have it fastened to the outside of a window. You can hang it on a hook or a bracket fastened to the outside of your house or apartment. You can place the bird feeder on a shelf fastened to the outside of your window. Make sure the bird feeder does not block the operation of the window. When photographing birds, make sure the window is always open. During other times, I’m sure you may want your window closed. If you’re using a ground floor window, you can place the bird feeder on a short pole and stick the pole in the ground just outside your window. Use your imagination. Don’t fall out your window doing this (disclaimer).
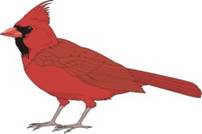
Now fill your bird feeder with mixed birdseed designed to attract the birds in your area. Sunflower seeds are great for cardinals; thistle seeds are marvelous for gold finches, nuthatches and woodpeckers favor suet, and almost all birds desire mixed seeds. I have found that birdseed mixed with grits and peanut butter drive most birds wild. I’ve even added raisins and crushed nuts just to be a gourmet about this. You may very well have some fun setting up and testing a gourmet bird kitchen and keep track of the types of birds that are attracted to your various concoctions. This might be important if you want to photograph and attract a particular bird species to your feeder.
After initially supplying your feeder with selected gastronomic delights, wait about two days so the birds can find the bird feeder and frequent it. If you live in the upper floors of an apartment building it will take up to one week for the birds to discover your bird feeder. Be patient. The birds will find your feeder and come to it daily -- usually several times a day. After the birds have found your feeder, you are ready to take photographs.
One word of caution: According to several bird experts, if you constantly fill your bird feeder in the autumn, several birds might stay the winter instead of flying south believing the source of food will last the season until spring. If you stop feeding the birds in the middle of winter, a few of them may not survive, so keep feeding the birds throughout the winter even if you stop photographing them. We certainly don't want to harm the birds, for it is their beauty we are trying to photograph.
Hummingbirds are easily photographed using the methods in this book. They require different feeding techniques as well as different camera techniques, which will be discussed in a separate chapter just for hummingbirds.
QUESTIONS FOR YOUR REVIEW AND UNDERSTANDING
(1) One piece of photographic equipment that is the most useful for bird-flight photography is (a) an attached electronic flash (b) an automatic electronic flash that is not attached to your camera (c) a manually operated electronic flash fastened to your camera (d) a manual electronic flash not attached to your camera.
(2) The main advantage of a SLR (single lens reflex) camera over a view-finder camera is (a) no advantage (b) you see what the film will see; you’re not looking at your subject on a different angle or perspective as you are with a viewfinder camera. (c) SLR cameras are less expensive to operate than a view finder camera (d) One can focus closer to an object with an SLR camera.
(3) An important piece of non-photographic equipment needed for photographing birds in flight is
(a) a bird feeder (b) a flashlight for night viewing (c) binoculars (d) bird identification charts(4) It is very advantageous to have a tree or bushes within view of your birdfeeder. The reason for this is (a) to provide an interesting background for your bird photographs (2) to offer the birds a place of shelter and safety (c) to provide a resting place for the birds free from predators (d) so you can see the birds in the tree fly toward your birdfeeder, thus getting ready for the photograph.
(5) Why should you not use a multiple-blinking flash designed to reduce red-eye to photograph birds?
(a) Because birds are not subject to red-eye (b) because the first flash will frighten away the bird, so when the last flash goes off, the one designed to expose the photograph, the bird will be gone. (c) because multiple flashes will fright away all the birds and they won't return to the feeder (d) because multiple flashes use up your batteries too fast.(6) What consideration is necessary before you keep your bird feeder filled with food all winter? ____________________________________________________________________________________
____________________________________________________________________________________(7) Why should a bird feeder be supplied with different types of bird food?
____________________________________________________________________________________
____________________________________________________________________________________(8) Why should you close off all sides of your bird feeder but one side? ____________________
____________________________________________________________________________________
____________________________________________________________________________________(9) Why can used SLR film cameras and their associated flash equipment be purchased now
(2006) at bargain prices? ______________________________________________________________
____________________________________________________________________________________(10) What are some advantages of a 10-foot cable release? _______________________________
____________________________________________________________________________________